In the first 5 parts of this series, I went through all the steps required to successfully install Forefront Protection 2010 for Exchange Server and Forefront Threat Management Gateway (TMG) 2010 on the same server as your Exchange Server Edge Transport role. I also looked at some basic configuration so we should now be able to send and receive email.
What about external access? TMG 2010 can also securely publish all your Exchange Server related services such as Outlook Web App (OWA), Outlook Anywhere and ActiveSync (EAS).
In this final part of the series I’ll look at publishing OWA to the internet. While my focus is mainly on OWA, Outlook Anywhere and EAS should also work after very little or no additional configuration. I’ll start by creating a new certificate request and then submitting it to certificate authority and then install the issued certificate. I’ll then go over how to correctly export the issued certificate and import it on the TMG server. I’ll then conclude the series by creating a new “Exchange Web Client Access Publishing Rule”.
A few notes before I begin.. When working with certificates, there are two options, I have opted to use my own Enterprise Root CA which has been installed on my domain controller. You are of course welcome to purchase a certificate from a third-party CA, if you decide that this is a better option for you, the basic configuration steps below will not differ all that much, the only difference will be in how you submit the request to the CA. I highly recommend purchasing a UC Certificate for this, please see the following Microsoft TechNet article for more information.
This post also assumes that your domain controllers already accept LDAP connections over SSL. To enable this, you need to install a server certificate on each of your domain controllers. The following Microsoft TechNet article may provide some guidance if you need further assistance with this.
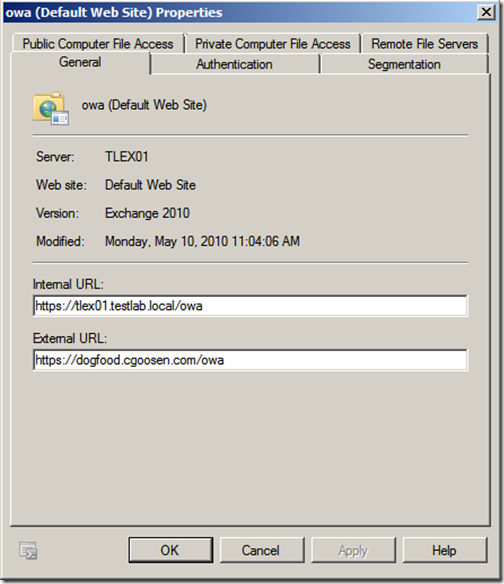
The first step is to confirm out OWA configuration, this is done by opening the Exchange Management Console, expand “Server Configuration”, click “Client Access” and then right-click “owa (Default Web Site)” and select “Properties”
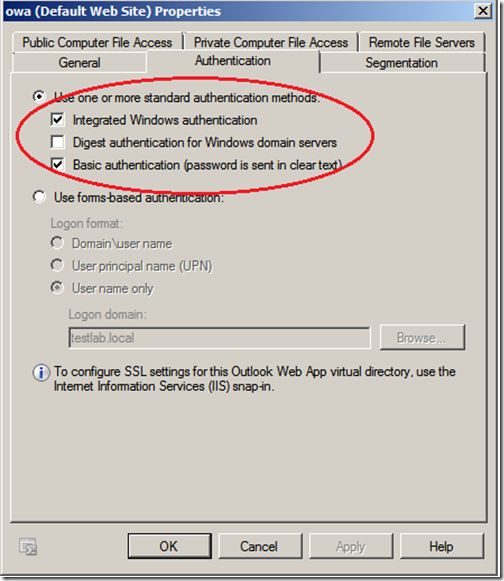
It is also important to change the authentication settings by clicking on the “Authentication” tab. We need to disable forms based authentication as TMG will be providing this feature. If you keep Exchange forms based authentication enabled your users will be prompted to log into OWA twice.
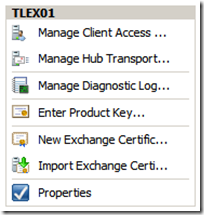
We now need to create a certificate request for the certificate that will be used to OWA. This can of course be done from the Exchange Management Shell by making use of the New-ExchangeCertifate cmdlet or by making use of the new wizard included in the Exchange Management Console. To access the wizard, click “Server Configuration”, select your CAS server and click “New Exchange Certificate”
“Enter a friendly name for the certificate”, I usually use the external FQDN here. Click “Next”
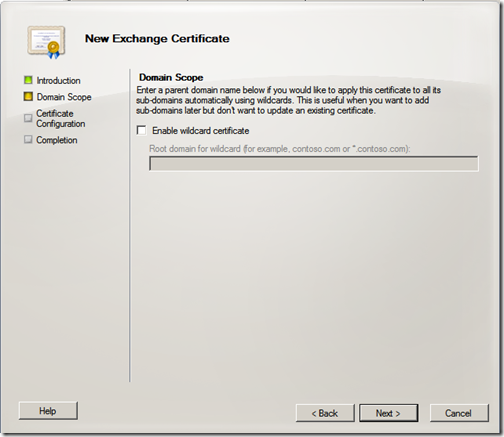
If you are using a wildcard certificate, you can enter the root domain name here, I have elected not to use a wildcard certificate. Click “Next”
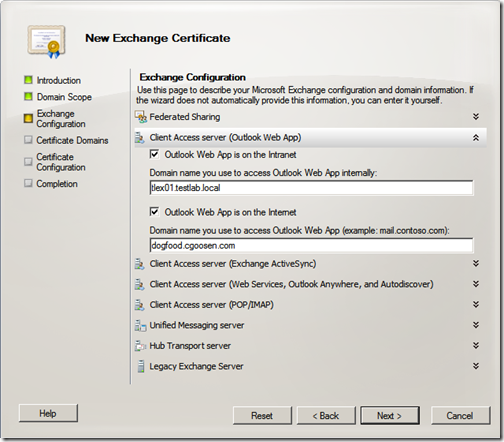
Next, select your required configuration. Enter your configuration and click “Next”
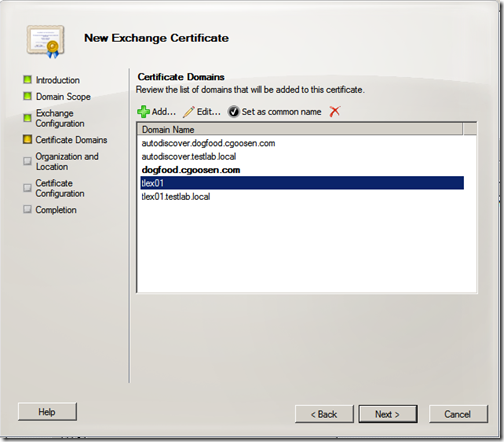
Review your certificate domains, I usually enter the server name without a suffix as well, but this is not necessarily required. Ensure that you have your internal, external and both autodiscover names listed and click “Next”
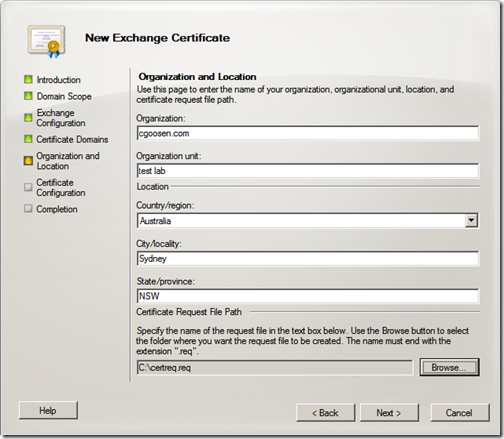
Enter your organization and location details and click “Next”
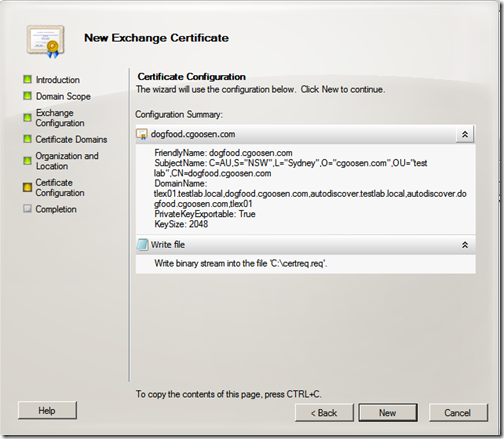
Review your certificate configuration summary and click “Next”
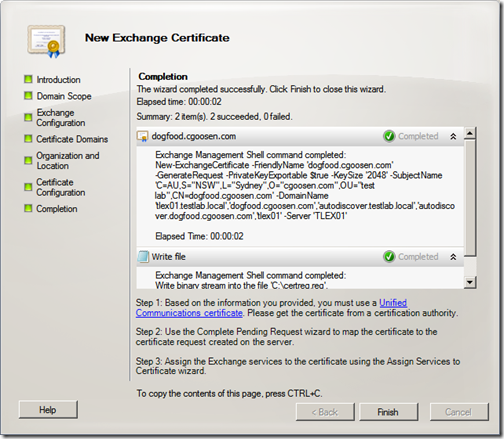
Once complete, click “Finish”
For those looking to use the Exchange Management Shell to complete this request, the command would look something like this:
New-ExchangeCertificate -FriendlyName 'dogfood.cgoosen.com' –GenerateRequest -PrivateKeyExportable $true -KeySize '2048' -SubjectName 'C=AU,S="NSW",L="Sydney",O="cgoosen.com",OU="test lab",CN=dogfood.cgoosen.com' –DomainName 'tlex01.testlab.local','dogfood.cgoosen.com','autodiscover.testlab.local','autodiscover.dogfood.cgoosen.com','tlex01' -Server 'TLEX01'
Now that we have completed out certificate request, it is time to submit this request to a CA. I’ll be using my Enterprise Root CA which is installed on my domain controller, so I’ll just submit the request opening https://tldc01.testlab.local/CertSrv Click “Request a certificate”
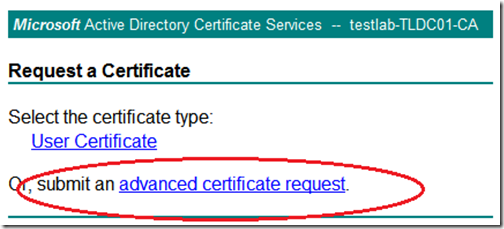
Then click on “advanced certificate request”
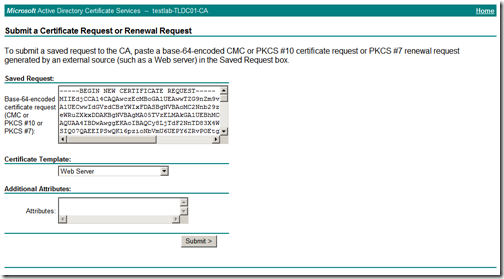
Since we have already created the certificate request, select “Submit a certificate request by using a base-64-encoded CMC or PKCS#10 file, or submit a renewal request by using a base-64-encoded PKCS#7 file”
Paste the certificate request in the box provided, select the “Web Server” template and click “Submit”
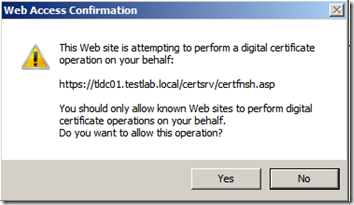
Click “Yes” to acknowledge the “Web Access Confirmation”
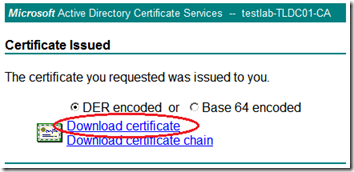
Next download only the “DER encoded” certificate.
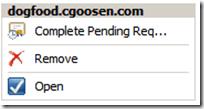
Now that we have our new certificate, it’s time to install it. Once again, click “Server Configuration” and select your new certificate. Click “Complete Pending Request”
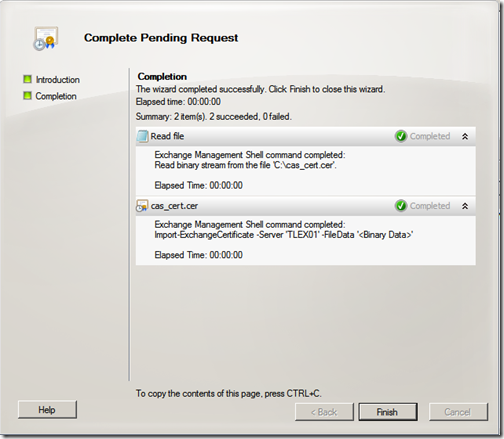
Select your new certificate and click “Complete”
Once completed, click “Finish”. You have now installed your new certificate.
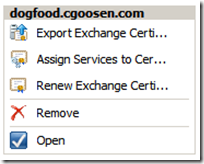
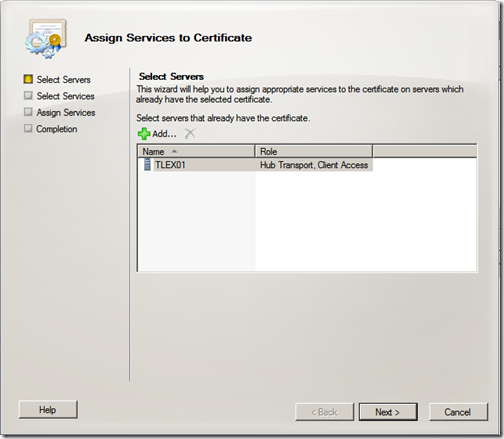
We now need to assign services to the certificate, click “Server Configuration” and select your new certificate. Click “Assign Services to Certificate”
Select your CAS server and click “Next”
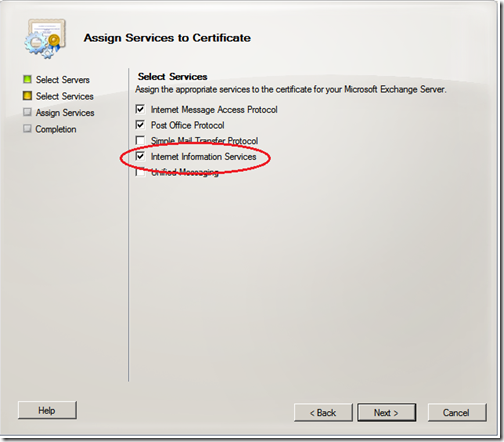
Ensure that you have selected “Internet Information Services” and click “Next”
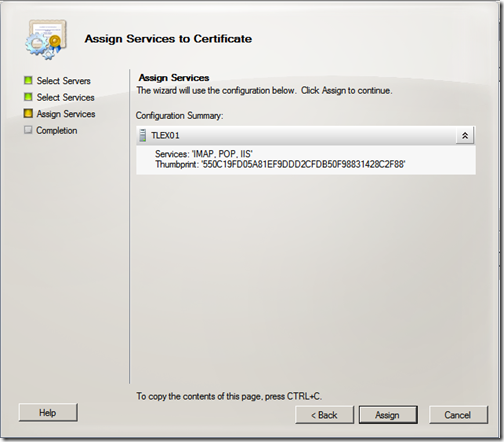
Review the configuration summary and click “Assign”
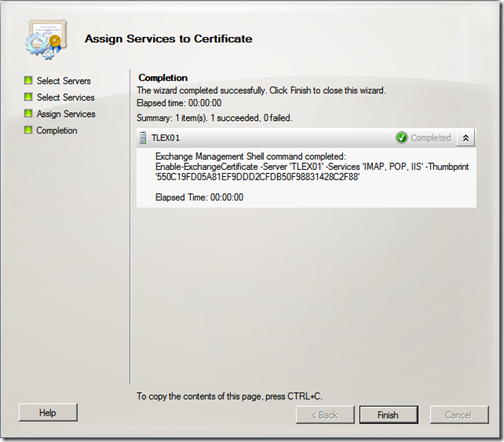
Once completed, click “Finish”
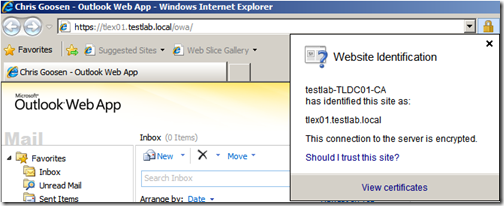
Now that we’ve installed the new certificate and assigned services to it, lets give it a quick test internally. My internal URL is https://tlex01.testlab.local/owa
Before we can import the certificate on the TMG server, you need to export the certificate along with its private key from the CAS server. Open the “Certificates” MMC and make sure you are viewing the “Local Computer”. We need to export 2 certificates. The first is the Enterprise Root CA certificate located in the “Trusted Root Certificate Authorities” store.
The second certificate is the new exchange certificate we just installed, it should be located in the “Personal” store.
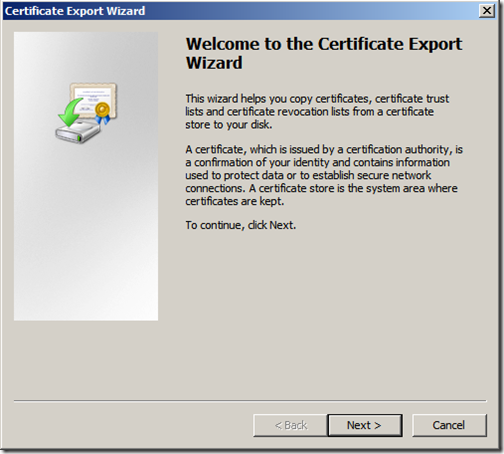
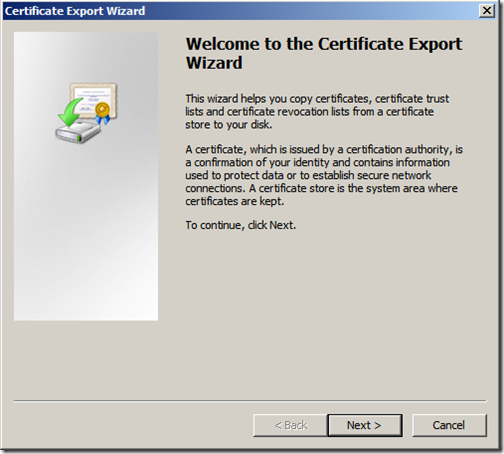
Lets start with the Enterprise Root CA certificate, right-click the certificate and click “Export”. Click “Next”
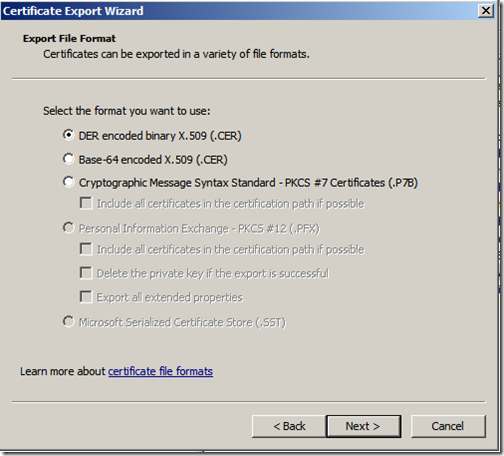
Select “DER encoded binary X.509 (.CER)” and click “Next”
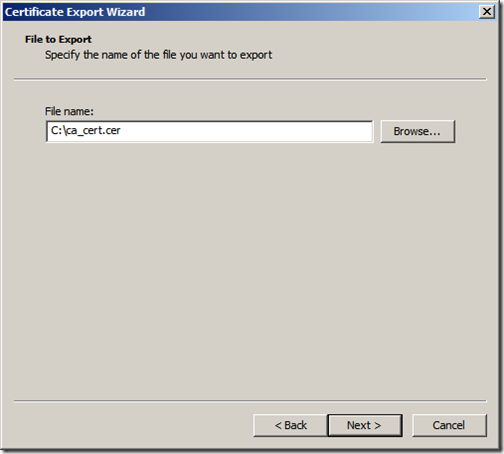
Give it a meaningful and name be sure to note down the location and click “Next”
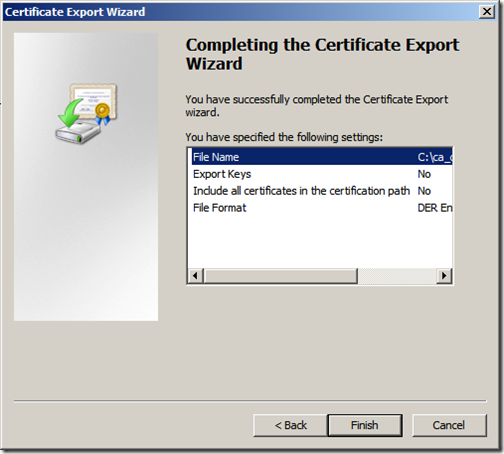
Review the settings and click “Finish”
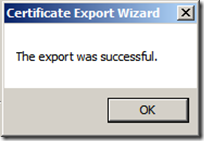
Once completed successfully, click “Ok”
Next we export the exchange certificate along with its private key. right-click the certificate and click “Export”. Click “Next”
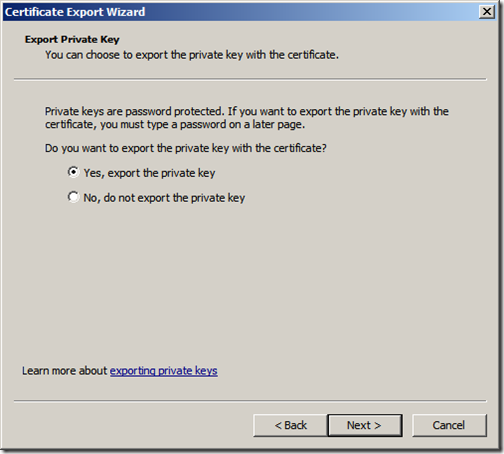
Ensure that you have selected “Yes, export the private key” and click “Next”
Ensure that you have selected “Export all extended properties” and click “Next”
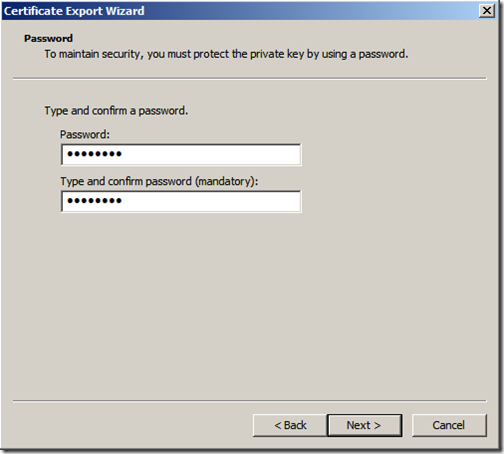
You need to protect the private key by using a password, be sure to remember what password you enter here and click “Next”
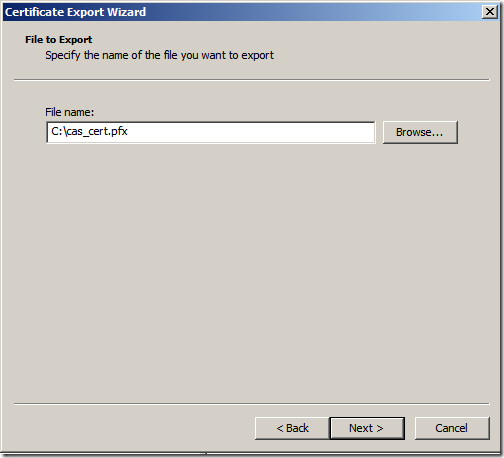
Give it a meaningful and name be sure to note down the location and click “Next”
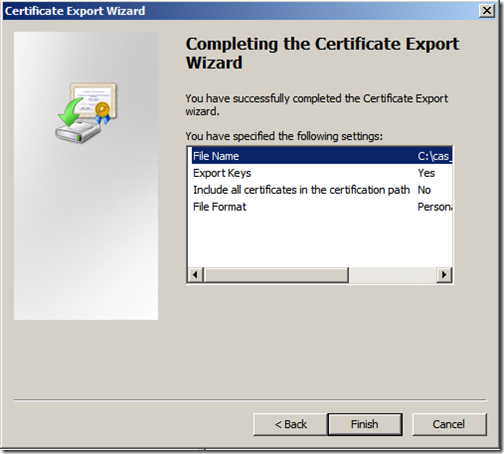
Review the settings and click “Finish”
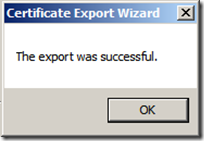
Once completed successfully, click “Ok”
Once you have those 2 certificates, (ca_cert.cer and cas_cert.pfx if you followed my naming convention) copy them to your TMG server. The log onto the TMG server and open the “Certificates” MMC and make sure you are viewing the “Local Computer”. We now repeat the previous process in reverse.
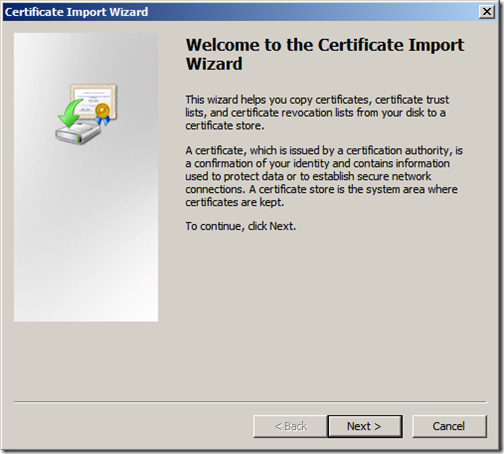
First we import the Enterprise Root CA certificate, expand the “Trusted Root Certificate Authorities” store, right-click “Certificates” and select “Import”. Click “Next”
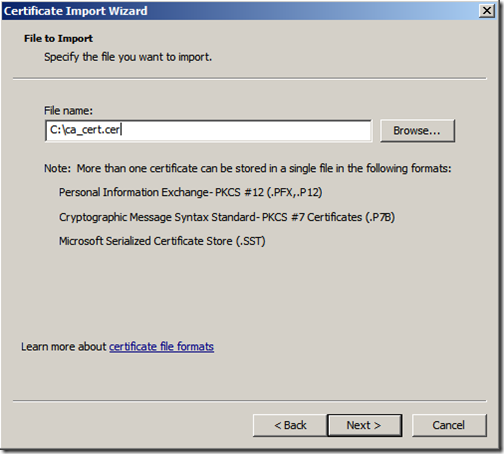
Locate the certificate and click “Next”
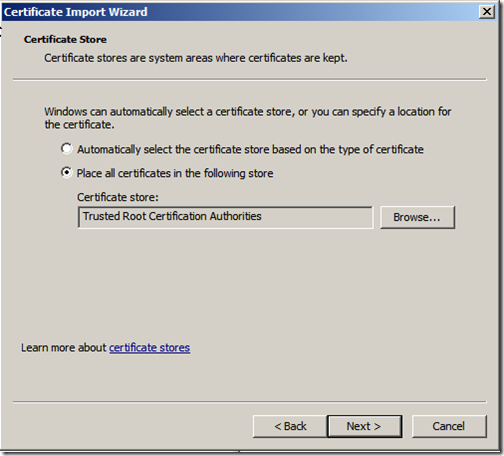
You will notice that it will already have the correct location specified, do not change this, just click “Next”
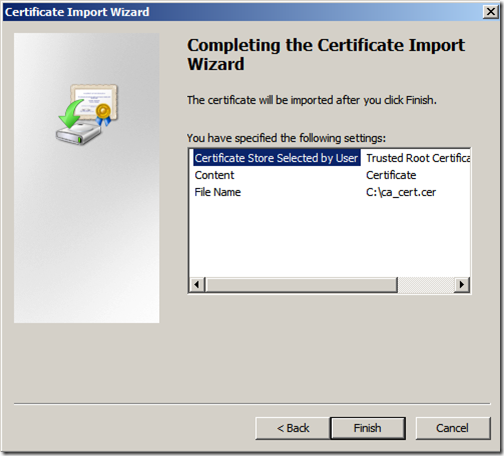
Review the settings and click “Finish”
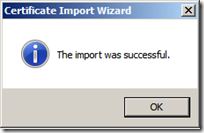
Once completed successfully, click “Ok”
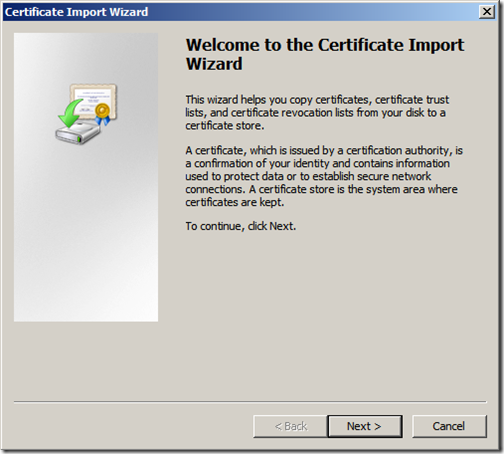
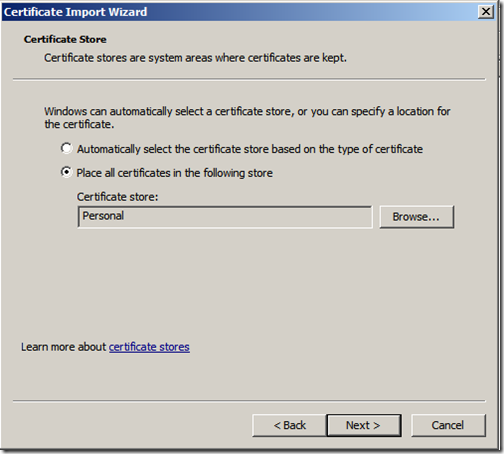
We then import the exchange certificate. Expand the “Personal” store right-click “Certificates” and select “Import”. Click “Next”
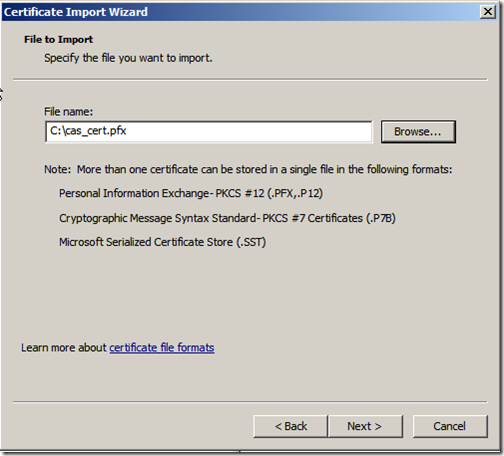
Locate the certificate and click “Next”
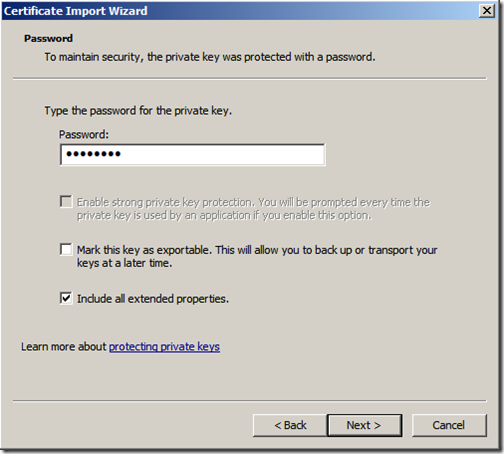
Enter the private key password (you do remember it, right?) Ensure that you have selected “Include all extended properties” and click “Next”
The correct location should already be specified, do not change this, just click “Next”
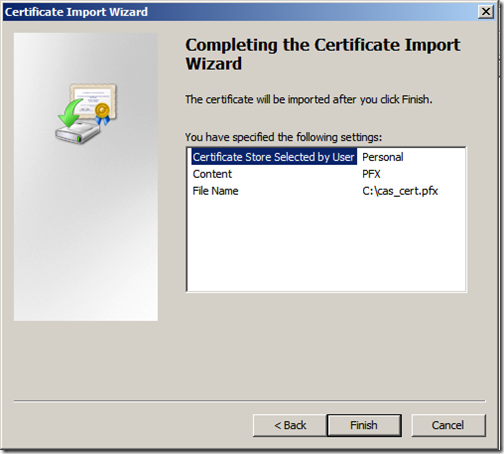
Review the settings and click “Finish”
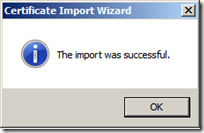
Once completed successfully, click “Ok”
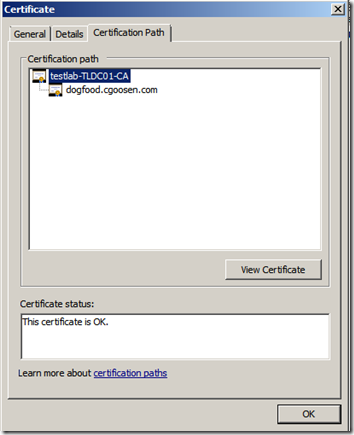
Once this is done, should should be able to double-click the exchange certificate and check the status. Both certificates should be “Ok”
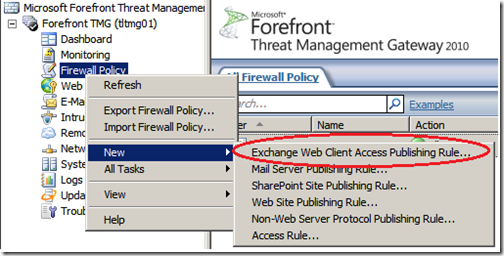
The final step in the process is to create a “Exchange Web Client Access Publishing Rule”. Open the TMG Management Console, right-click “Firewall Policy”, select “New” and then select “Exchange Web Client Access Publishing Rule”
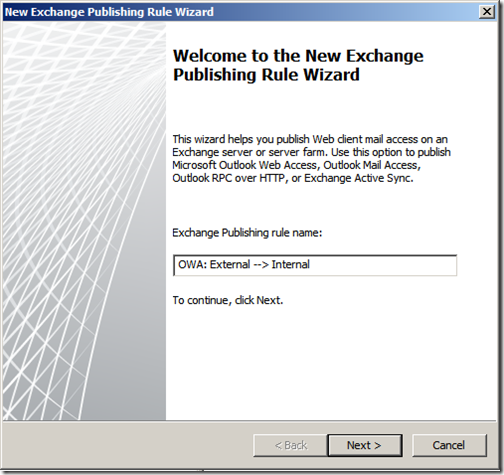
Give your rule a meaningful name and click “Next”
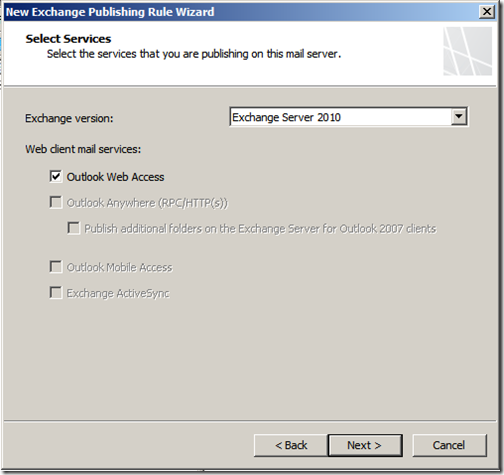
Select your Exchange version and select “Outlook Web Access”, then click “Next”
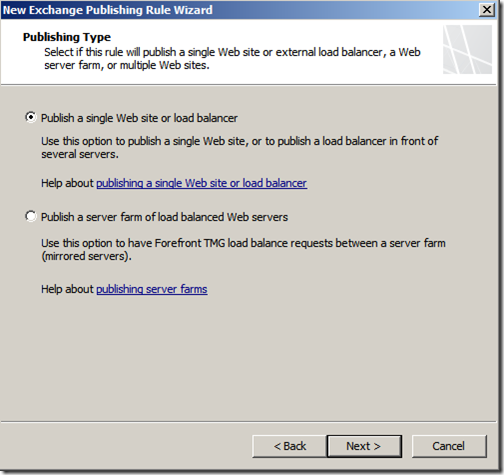
Select your publishing type and then click “Next”
Since we will be using SSL, select that option and click “Next”
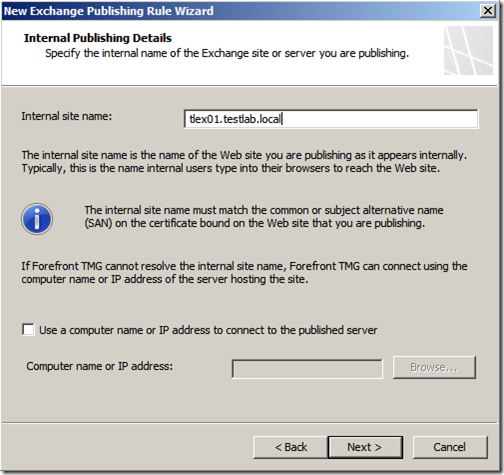
Enter your internal site name, only enter the FQDN, there is no need to add HTTP/S or /OWA. Click “Next”
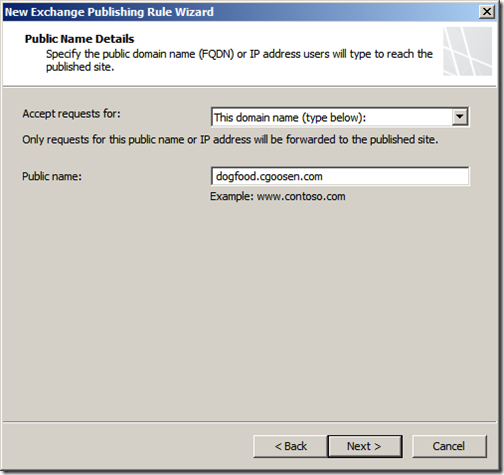
Enter your public name here, again only the FQDN. Click “Next”
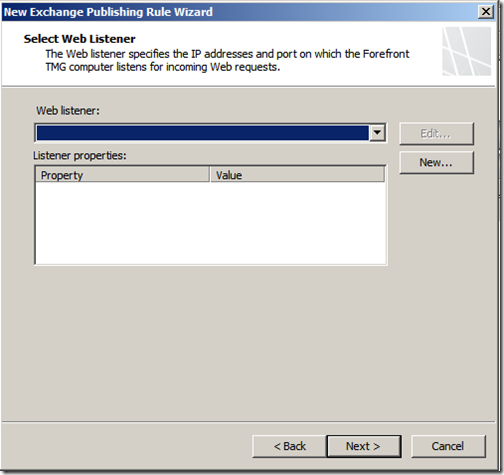
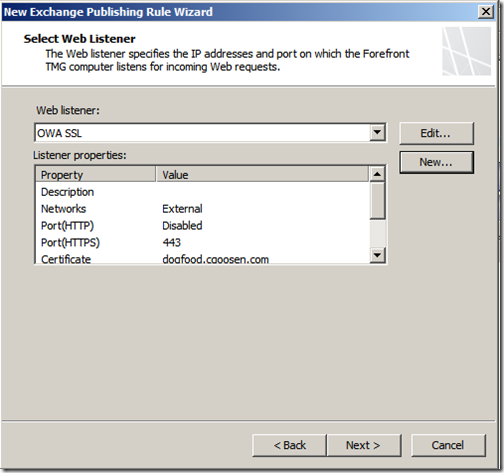
Select your web listener, since I don’t already have one, I am going to create a new one by clicking “New”
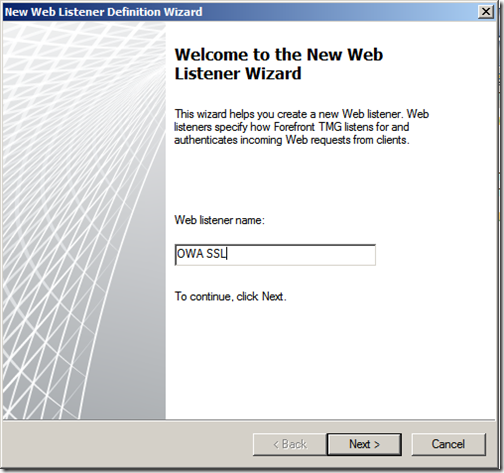
Enter a meaningful name and click “Next”
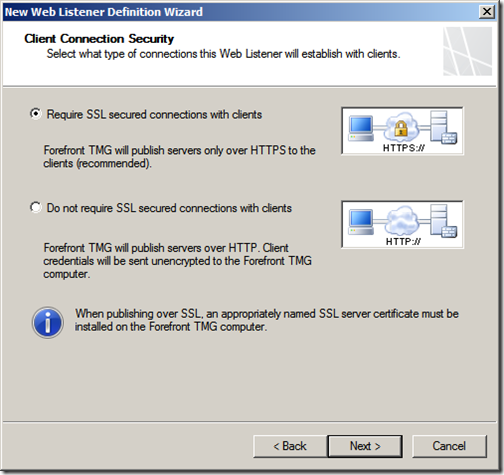
We will be using SSL and want to require SSL connections from all clients. Click “Next”
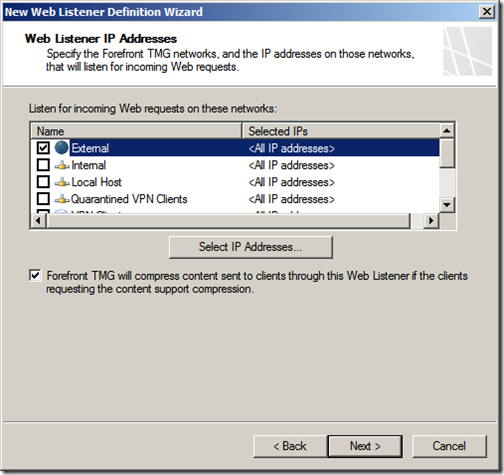
Select your listener IP address, this should be your external network address. Click “Next”
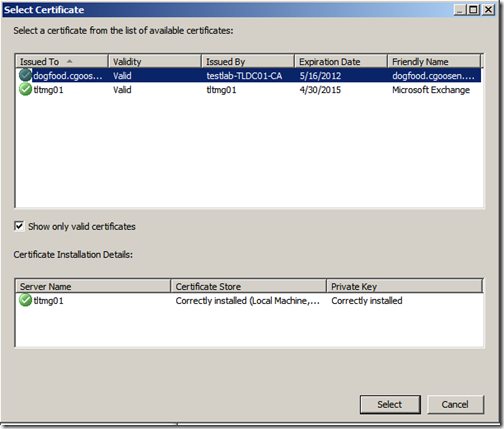
Click “Select Certificate” and then select the exchange certificate we installed in the previously. Click “Select”
Click “Next”
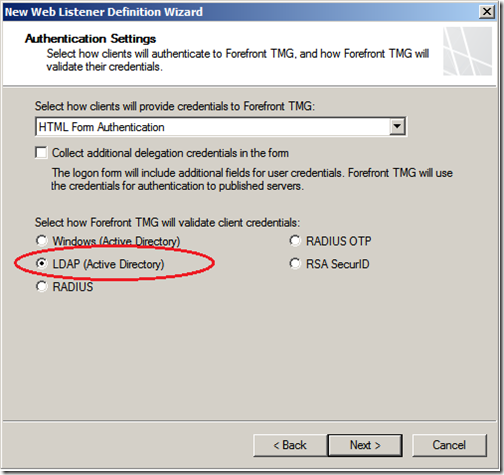
Next we look at authentication settings, since our server is not a part of the domain, we are unable to use “Windows” authentication. Make sure “HTML Form Authentication” is selected, select “LDAP (Active Directory)” and click “Next”
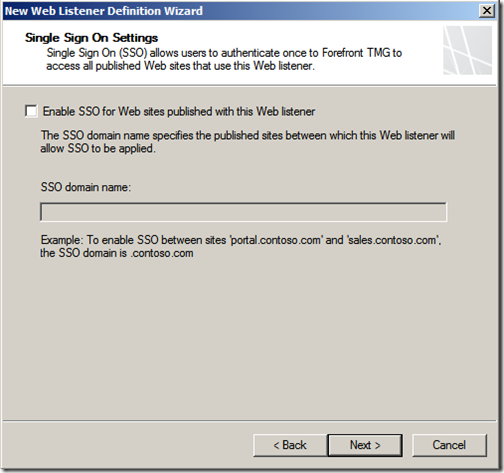
I won’t be making use of SSO, make your selection and click “Next”
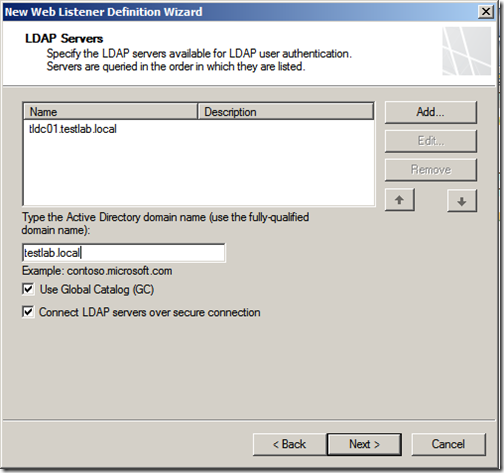
We need to add at least one LDAP server for user authentication, add your domain controllers here, type your domain name and I highly recommend that you make use of LDAP over SSL. Click “Next”
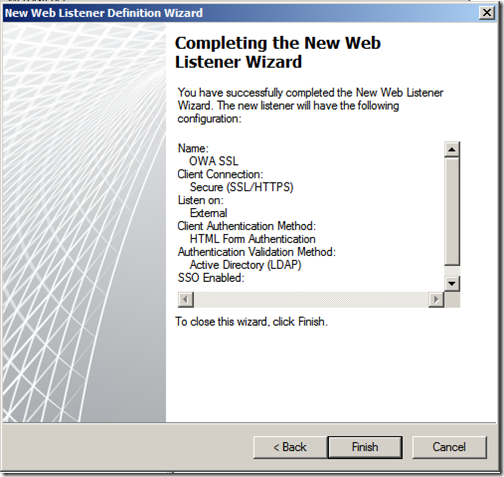
Review your web listener configuration and click “Finish”
Select the web listener you just created and click “Next”
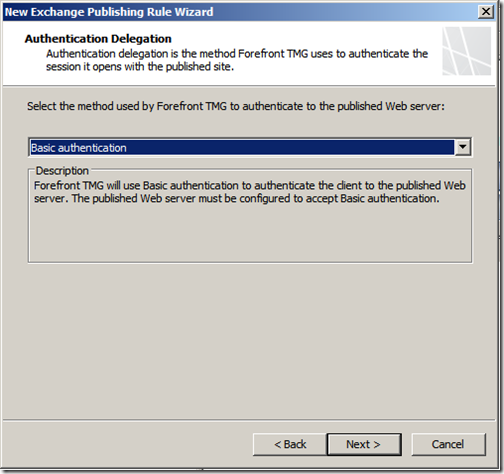
Select “Basic Authentication” and then click “Next”
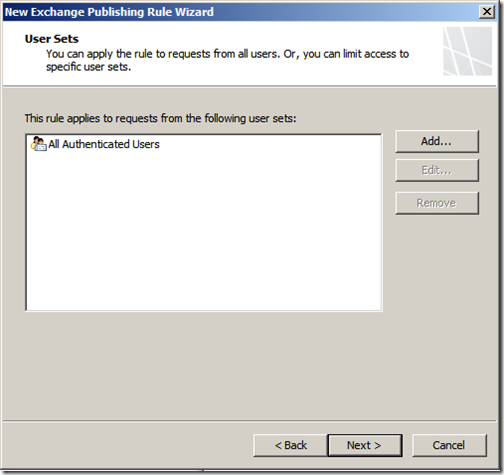
This rule will apply to “All Authenticated Users”, click “Next”
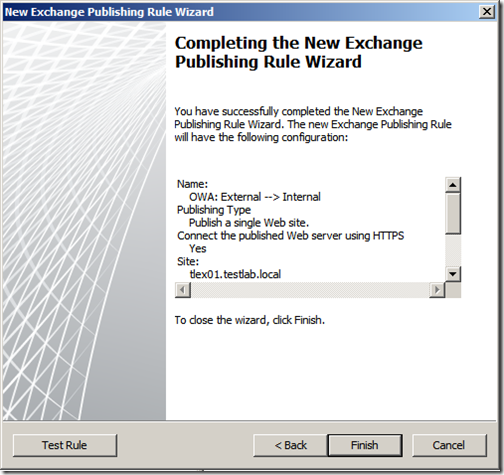
Review your configuration and then click “Finish” to create the rule.
Once the rule has been created, we need to apply it to TMG, click “Apply”
You should now see your rule listed..
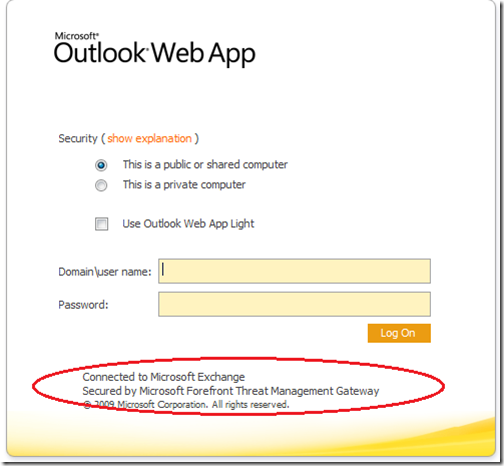
Now for the fun part, lets test our configuration. If you visit your external URL, mine is https://dogfood.cgoosen.com/owa you should be presented with a OWA login form. Notice the “Secured by Microsoft Forefront Threat Management Gateway” banner at the bottom.
Enter your user name in the format “Domain\user name” and your password and click “Log On” If you have any certificate alerts, you may need to install your Root CA certificate to the “Trusted Root Certification Authorities” store on your workstation. If you are using an Enterprise Root CA, it uses Group Policy to propagate its certificate to the “Trusted Root Certification Authorities” store for all users and computers in the domain.
If everything has been correctly configured, you should be presented with your inbox.
To summarise, in this final part of the series I created a new certificate request and then submitted it to certificate authority. Once I had downloaded the issued certificate, I installed it on my exchange CAS server and assigned services to it. I then exported the issued certificate and imported it on the TMG server. To complete the process, I created a new “Exchange Web Client Access Publishing Rule”.
In this 6 part series, I went through the process of installing Exchange Server Edge, Forefront Protection 2010 for Exchange Server and TMG 2010 on the same server. Consolidating these services greatly reduces management complexity and overhead.
